
Maximize Your Precision: The Complete Guide to Self-Leveling Laser Tools
Accurate measurements and precise alignments are essential in many projects, from home renovations to professional construction. Traditional tools like spirit levels and tape measures often fall short when it comes to speed and accuracy. This is where self-leveling laser tools come into play. They offer a reliable way to ensure your work is perfectly aligned, saving time and reducing errors.
This guide explores everything you need to know about self-leveling laser tools, including how they work, their key features, practical applications, and tips for choosing the right one for your needs.
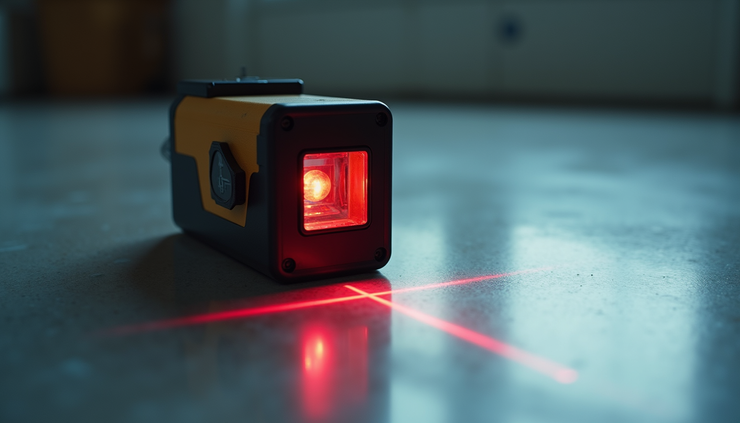
Self-leveling laser tool projecting cross lines on a wall for precise alignment
What Is a Self-Leveling Laser Tool?
A self-leveling laser tool is a device that projects laser lines or points onto surfaces to help users achieve accurate horizontal, vertical, or cross-line alignments. Unlike manual levels, these tools automatically adjust to ensure the laser lines are perfectly level or plumb, even if the device itself is slightly tilted.
The most common types include:
Cross Line Laser Levels: Project horizontal and vertical lines that intersect, forming a cross. Ideal for tasks like installing tiles, cabinets, or framing walls.
Infrared Positioning Pointers: Emit infrared laser beams used for precise positioning, often in conjunction with detectors for outdoor or long-distance applications.
Self-leveling mechanisms typically use pendulums or electronic sensors to detect the device’s orientation and adjust the laser accordingly.
How Self-Leveling Works
The core advantage of these tools is their ability to self-correct. When placed on a surface, the internal pendulum or sensor detects if the tool is off-level. If the tilt is within a certain range (usually ±4 degrees), the device automatically adjusts the laser projection to true level or plumb lines.
If the tilt exceeds the self-leveling range, most tools alert the user with flashing lights or sound signals, preventing inaccurate measurements.
Key Features to Look For
When selecting a self-leveling laser tool, consider these important features:
Accuracy
Look for tools with accuracy ratings of ±1/8 inch at 30 feet or better. This ensures your lines are precise enough for most construction and DIY projects.
Laser Type and Visibility
Red lasers are common and visible indoors, while green lasers are brighter and easier to see in daylight or larger spaces. Infrared lasers require special detectors but are useful for outdoor work.
Self-Leveling Range
A wider self-leveling range allows more flexibility in positioning the tool on uneven surfaces.
Mounting Options
Magnetic bases, tripods, and wall mounts increase versatility and ease of use.
Battery Life
Longer battery life means less downtime during projects. Rechargeable batteries add convenience.
Durability
Look for water-resistant and shockproof designs if you plan to use the tool in tough environments.
Practical Applications of Self-Leveling Laser Tools
These tools are invaluable for a variety of tasks:
Installing Tiles
Use cross line lasers to create perfectly straight grout lines on floors and walls.
Hanging Cabinets and Shelves
Ensure cabinets are level and aligned with existing fixtures.
Framing and Drywall
Mark studs and drywall sheets with precise vertical and horizontal lines.
Electrical Work
Align outlets, switches, and conduit runs accurately.
Painting and Wallpapering
Create straight reference lines for borders and patterns.
Outdoor Landscaping
Infrared positioning pointers help with grading, fence installation, and deck building.
Tips for Using Self-Leveling Laser Tools Effectively
Set Up on a Stable Surface
Place the tool on a flat, stable surface or use a tripod for best results.
Check the Self-Leveling Range
Make sure the tool is within its self-leveling range before starting.
Use Laser Detectors Outdoors
Infrared or green lasers can be hard to see in bright sunlight; detectors help locate the beam.
Mark Reference Points
Use a pencil or tape to mark laser lines for ongoing reference.
Keep the Tool Clean and Calibrated
Dust and bumps can affect accuracy. Regularly clean lenses and check calibration.
Choosing the Right Self-Leveling Laser Tool for Your Project
Consider the following when making your choice:
Project Size and Environment
For small indoor projects, a basic red cross line laser may suffice. For larger or outdoor jobs, green lasers or infrared pointers with detectors are better.
Budget
Prices vary widely. Higher-end models offer more features and durability but may not be necessary for occasional use.
Ease of Use
Look for intuitive controls and clear indicators.
Additional Features
Some models include pulse modes for use with detectors, multiple laser lines, or remote controls.
Maintenance and Safety
Store Properly
Keep the tool in its case when not in use to protect it from damage.
Avoid Direct Eye Exposure
Never look directly into the laser beam or point it at others.
Replace Batteries as Needed
Low power can reduce laser brightness and accuracy.
Calibrate Regularly
Follow manufacturer instructions to maintain precision.
Self-leveling laser tools transform how you approach alignment and leveling tasks. They save time, reduce mistakes, and improve the quality of your work. Whether you are a DIY enthusiast or a professional, investing in the right tool and learning how to use it effectively will maximize your precision on every project.


Comments